Monday, August 26, 2013

Increase the Intensity of Dark Eyeshadow and Prevent Creasing

I was always a big fan of the dark, smoky eye but used to have huge problems with darkening the colour on my lid to its full capacity. Often you can pile on the shadow but it either wears off during the night or (in the case of black) it can look more grey than the blackest black you were aiming for.

The key here is to use a good primer (Urban Decay Eyeshadow Primer Potion) followed by a dark base cream shadow. I am a massive fan of Maybelline Colour Tattoo cream eyeshadow in Tough as Taupe/ Permanent Taupe as a base for any shade of smoky eye.

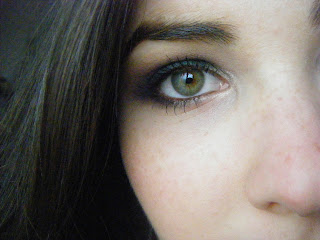
Here is a smoky eye look I created with a dark green shimmer as the main colour for the look. You can use either dark brown, black, deep purple etc. in the place of this shadow.

Step 1: Apply foundation as normal, concealer, highlighter, bronzer, blush and Urban Decay Eyeshadow Primer Potion on your eyelids. Line eyes using either liquid liner or pencil liner. Personally I favour the intensity of liquid liner for this look.


Step 2: Apply a dark cream based eyeshadow with long lasting properties like Maybelline Colour Tattoo cream eyeshadow in Tough as Taupe/ Permanent Taupe. I like this shade as it warms up the eye and mixes well with the crease colours I have chosen. 
Step 3: Using a fairly stiff eyeshadow brush, collect a good amount of the dark colour of your choice on the brush (I'm using Bourjois' Little Round Pot Eyeshadow in no. 7), tap it off the back of your hand to reduce fallout and press the colour onto your lid, as far as the crease. Don't worry about being too neat!

Step 4: Using a fluffy crease brush, I swirl it in my pink blush of choice Bourjois' Little Round Pot Blush in Rose D'Or (No. 34) and then brush it through the shade 'Toasted' in the Naked Palette by Urban Decay to create a pinky/brown shade I love as a crease colour. Feel free to use your crease colour of choice!

Step 5: Blend out the crease colour with a neutral creamy shade like the Latte shade in Natural Collection's Mocha/Latte Duo Eyeshadow, all the way up to the brow. Lightly apply the Mocha shade (or any brown shadow) in the outer corner of the eye with the same brush you applied the green shade with at the start. (Optional, but gives the eye more dimension!)
Step 6: Apply pencil liner to bottom lashes, softening the line by smudging it using the same brown shadow on an eyeshadow applicator. Apply liner to waterline. Apply a shimmery shade like 'Sin' from the Naked Palette by Urban Decay on the inner corner of the eye and apply your mascara of choice. 

Let me know if you find this useful!

Thursday, August 22, 2013

The most impressive, long lasting eyeliner yet!

It's been a while since I've been blogging as I have been ever so slightly distracted by other work based projects, but I have made a discovery recently of a product I couldn't help but share with everyone! 

On a recent trip to Spain, I decided to spend some quality time exploring Sephora, a store which (to the best of my knowledge!) can not be found either in Ireland or in the UK. I made a couple of purchases, but the one I was most excited about waaaaasss... 
Sephora's waterproof eyeliners!
http://www.sephora.com/waterproof-contour-eye-pencil-P377784
Now the idea of this to me while on holidays was pretty appealing. I mean, generally when I go to the beach/pool etc, I feel pretty naked without makeup on as I find my eyes kind of disappear without liner. There is no other makeup product that I feel this way about so I really thought I had struck gold here. 
HOWEVER, I was a little disappointed to discover that this pencil does not really stand up all that well to water. Swimming seemed to have been a bit much for it to handle. Then again, I find when swimming it is nearly impossible not to rub your eyes at some point and good luck finding any eyeliner that can stand up to that when combined with water!

You may ask why I am raving about this product if this is the case... Well, in all other scenarios, this pencil comes out trumps: 

1. It really does last a really long time, even when it is hot and your skin gets oily.

2. It is SO easy to use. Really smudgeable and easy to blend. Usually I find kohl pencils can be easy to smudge, but then wear off within an hour and also end up ALL over your eye, so this is something I am excited about!

3. The shade I have is '13, Tiramisu Brown' and I love this as an eyebrow filler. (Keep in mind that I have very dark eyebrows and this may not suit everyone!) Basically I just draw in a few lines from my arch to the end of my brow and then brush through my brows to soften the lines and blend it in. Now, in terms of swimming, I found it really lasted well on my eyebrows. (Could this be because I was not rubbing them as much as my eyes??) It is also amazing to wear in a normal, day to day setting as it lasts really well, unlike some other powders and pencils I have used in the past. 

I also purchased a waterproof jumbo liner with the intention of wearing it as a base for eyeshadow and a highlighter for the inner corners of my eyes and under my brows. 
http://www.sephora.com/jumbo-liner-12hr-wear-waterproof-P284507?skuId=1311067
This product failed to impress me as much. It  is pretty useless as an eyeshadow/base because it creases pretty much straight away and I find it gets a little clumpy in my eye's inner corner. It's not TERRIBLE to wear as a highlighter, but I wouldn't wear it as one when not intending on doing something water related!
Let me know if you have tried either of these products lately! 

Until next time!